o2oa使用手册
第1章 功能简介及概述
第6章 平台部署与配置
  • 6.1 安装部署-在windows系统中部署o2oa开发平台
  • 6.2 安装部署-在linux系统中部署o2oa开发平台
  • 6.3 安装部署-通过docker hub快速部署docker镜像
  • 6.4 安装部署-在宝塔/phpstudy中部署o2oa开发平台
  • 6.5 安装部署-o2oa开发平台之http端口规划
  • 6.6 安装部署-平台服务器版本升级操作说明
  • 6.7 安装部署-私有化部署服务器架构推荐
  • 6.8 安装部署-o2oa开发平台集群部署配置及操作说明
  • 6.9 安装部署-在线部署自定义应用的war包和jar包
  • 6.10 服务器配置与管理-​o2oa主要配置文件说明
  • 6.11 服务器配置与管理-服务器端口冲突和端口修改
  • 6.12 服务器配置与管理-如何修改服务器内存占用率?
  • 6.13 服务器配置与管理-如何访问和操作h2内置数据库
  • 6.14 服务器配置与管理-​如何在o2oa中使用mysql数据库?
  • 6.15 服务器配置与管理-如何修改平台支持的数据库驱动包
  • 6.16 服务器配置与管理-o2oa使用opengauss(华为高斯数据库)配置
  • 6.17 服务器配置与管理-o2oa开发平台平台数据库配置信息样例
  • 6.18 服务器配置与管理-配置o2oa服务器连接o2云
  • 6.19 服务器配置与管理-o2oa实现服务器随操作系统自动启动
  • 6.20 服务器配置与管理-文件存储服务器配置
  • 6.21 服务器配置与管理-工作日节假日配置
  • 6.22 服务器配置与管理-为平台增加全文检索功能
  • 6.23 服务器配置与管理-消息提醒配置说明
  • 6.24 服务器配置与管理-自定义消息提醒
  • 6.25 服务器配置与管理-定制消息通知的内容
  • 6.26 服务器配置与管理-消息通知过滤
  • 6.27 服务器配置与管理-为待办创建配置邮件通知
  • 6.28 服务器配置与管理-待办待阅数据的查询操作和管理
  • 6.29 服务器配置与管理-​自动执行平台数据的备份与恢复
  • 6.30 服务器配置与管理-数据导出导入与系统数据备份
  • 6.31 ​服务器配置与管理-定期自动执行数据备份与恢复
  • 6.32 系统安全-o2oa作为认证中心实现基于oauth2单点认证
  • 6.33 系统安全-o2oa基于nginx的ssl跳转、转发配置
  • 6.34 o2oa(翱途)开发平台如何基于nginx上下文分发的方式快速集群部署
  • 6.35 系统安全-访问日志相关配置
  • 6.36 系统架构-平台集群化部署之基于nginx端口分发机制实现集群部署
  • 6.37 系统安全-审计日志相关配置
  • 6.38 系统安全-平台日志文件说明
  • 6.39 系统架构-基于nginx快速集群部署-上下文分发
  • 6.40 系统安全-o2oa日志输出设置log4j2.xml
  • 6.41 系统安全-用户密码初始化规则的设定
  • 6.42 系统安全-启用https(百度云版)
  • 6.43 系统安全-启用https(腾讯云版)
  • 6.44 系统安全-自签名ssl证书验证https功能
  • 6.45 系统安全-登录密码rsa加密
  • 6.46 系统安全-用户登录ip限制
  • 6.47 系统安全-在用户登录过程中启用图形验证码
  • 6.48 系统安全-平台部署之使用非root用户运行服务
  • 6.49 系统安全-o2server启用国密加密设置
  • 6.50 系统安全-日志应用使用说明
  • 6.51 系统安全-用户重置密码操作
  • 6.52 系统安全-超级管理员(xadmin)密码修改
  • 6.53 系统安全-使用web端运行服务器管理命令
  • 6.54 系统安全-o2server无法正常显示验证码解决办法
  • 6.55 o2oa(翱途)开发平台前端安全配置建议(一)
  • 第16章 开发知识及常见问题
  • 16.1 o2oa如何实现文件跨服务器的备份
  • 16.2 o2oa(翱途)服务器故障排查
  • 16.3 开发知识-让后端代理/接口脚本编写也能像前端一样用上debugger
  • 16.4 常见问题-sqlserver中创建新数据库使用哪个中文编码?
  • 16.5 o2oa(翱途)流程引擎中如何修改,定制流程的流转记录
  • 16.6 mysql数据库备份
  • 16.7 domain不正确的时候如何强制设置成正确的
  • 16.8 配置文件中使用密文存储密码
  • 16.9 常见问题-连接mysql出现 public key retrieval is not allowed 的错误
  • 16.10 常见问题-查看表结构
  • 16.11 常见问题-7.2及以上版本开启web代理后请求中没有正确使用web端口问题解决方式
  • 16.12 linux环境libreoffice安装及使用
  • 16.13 在o2oa中使用网络会议(二):openmeetings与o2oa认证配置
  • 16.14 在o2oa中使用网络会议(一):openmeetings-5.1.0亲手安装整理 step-by-step
  • 16.15 藕粉社区问答系列1
  • 16.16 藕粉社区问答系列2
  • 16.17 藕粉社区问答系列3
  • 16.18 快速入门-平台相关资料汇总
  • 16.19 快速入门-服务器总体介绍汇总
  • 16.20 快速入门-流程表单载入基础数据
  • 16.21 快速入门-常用表单脚本样例汇总
  • 16.22 快速入门-自定义表数据分页样例
  • 16.23 云服务器-阿里云ecs服务器的端口启用
  • 16.24 开发知识-react篇:在o2oa平台框架中使用react
  • 16.25 开发知识-react篇:在o2oa门户页面中使用react
  • 16.26 开发知识-vue篇:在vue应用中集成o2oa
  • 16.27 开发知识-vue篇:使用vue-cli开发o2应用
  • 16.28 开发知识-vue篇:在o2门户页面中使用vue
  • 16.29 平台中使用druid数据库连接及监控
  • 16.30 开发知识-在paas平台上部署o2oa开发平台
  • 16.31 开发知识-如何使用tomcat架设webdav服务器
  • 16.32 开发知识-单个端口模式的nginx和系统配置
  • 16.33 开发知识-linux非root用户如何使用80端口启动o2oa
  • 16.34 开发知识-o2oa平台启用eruda进行移动端调试
  • 16.35 开发知识-神通数据库安装
  • 16.36 开发知识-人大金仓数据安装
  • 16.37 开发知识-中标麒麟安装达梦数据库(dm8)
  • 16.38 开发知识-中标麒麟安装人大金仓详细步骤
  • 16.39 开发知识-使用vnc连接中标麒麟v7操作系统
  • 16.40 开发知识-鲲鹏(arm)麒麟操作系统如何替换yum源?
  • 16.41 开发知识-数据优化知识点
  • 16.42 水印安全-附件水印|加密|文档格式转换图片|pdf
  • 16.43 消息队列-配置activemq、kafka消息队列
  • 16.44 常见问题-数据导出或者导入时发生oom异常
  • 16.45 常见问题-如何让用户在首次登录时,必须对初始密码进行修改
  • 16.46 常见问题-如何在模块部署中控制模块的访问权限
  • 16.47 常见问题-如何在平台中开发ftp文件上传文件的服务?
  • 16.48 常见问题-如何使用服务管理调用webservice
  • 16.49 常见问题-如何使用脚本调用外部服务
  • 16.50 常见问题-如何使用脚本控制流程自动流转
  • 16.51 常见问题-如何通过脚本调用系统内服务
  • 16.52 常见问题-接口代码疑惑解答汇总
  • 16.53 常见问题:maven编译o2server错误: java heap space
  • 16.54 常见问题-集群配置后启动报错:nullpointerexception
  • 16.55 常见问题-服务器错误:can not decrypt token
  • 16.56 常见问题-ios移动办公无法收到验证码
  • 16.57 常见问题-服务器和日志时间相差12小时的问题
  • 16.58 常见问题-为什么127.0.0.1可以访问但其他ip无法访问
  • 16.59 藕粉社区问答系列4
  • 16.60 开发知识-react篇:在react应用中集成o2oa

  • 开发知识-九游会官网登录入口网页

    时间:2022-08-03   

    1594174885377-7fb314f2-7484-4a31-8328-fe8f6d6f098b.png


    查看操作系统信息

    [root@ecs-f61c-0001 ~]# nkvers
    ############## neokylin linux version#################
    release:
    neokylin linux advanced server release v7update6 (chromium)
    kernel:
    4.14.0-115.5.1.el7a.06.aarch64
    build:
    neokylin linux advanced server 
    release v7update6/(chromium)-aarch64
    b06.lic/20190619

    安装vncserver


    以root用户运行以下命令来安装vncserver

    [root@ecs-f61c-0001 sysconfig]# yum install tigervnc-server


    同样运行以下命令来安装vncviewer

    [root@ecs-f61c-0001 sysconfig]# yum install vnc


    停止并禁用防火墙,或者开放5901,5902端口

    [root@ecs-f61c-0001 sysconfig]# systemctl stop firewalld.service
    [root@ecs-f61c-0001 sysconfig]# systemctl disable firewalld.service


    vnc配置和应用

    vncserver的配置,创建一个新的配置文件,以开启1号窗口为例(也可以同时开启多个窗口,修改数字即可),方法如下(以下命令复制了两个vncserver服务,也就是可以同时允许2个桌面启动,多个桌面以此类推):

    [root@ecs-f61c-0001 sysconfig]# cp /lib/systemd/system/vncserver@.service /lib/systemd/system/vncserver@:1.service
    [root@ecs-f61c-0001 sysconfig]# cp /lib/systemd/system/vncserver@.service /lib/systemd/system/vncserver@:2.service

    编辑/lib/systemd/system/vncserver@:1.service,设置用户root相关参数,最终内容如下(如果有多个服务,全部需要查看一下,一般不需要修改):

    # the vncserver service unit file
    #
    # quick howto:
    # 1. copy this file to /etc/systemd/system/vncserver@.service
    # 2. replace  with the actual user name and edit vncserver
    #    parameters appropriately
    #    (execstart=/usr/sbin/runuser -l  -c "/usr/bin/vncserver %i"
    #     pidfile=/home//.vnc/%h%i.pid)
    # 3. run `systemctl daemon-reload`
    # 4. run `systemctl enable vncserver@:.service`
    #
    # do not run this service if your local area network is
    # untrusted!  for a secure way of using vnc, you should
    # limit connections to the local host and then tunnel from
    # the machine you want to view vnc on (host a) to the machine
    # whose vnc output you want to view (host b)
    #
    # [user@hosta ~]$ ssh -v -c -l 590n:localhost:590m hostb
    #
    # this will open a connection on port 590n of your hosta to hostb's port 590m
    # (in fact, it ssh-connects to hostb and then connects to localhost (on hostb).
    # see the ssh man page for details on port forwarding)
    #
    # you can then point a vnc client on hosta at vncdisplay n of localhost and with
    # the help of ssh, you end up seeing what hostb makes available on port 590m
    #
    # use "-nolisten tcp" to prevent x connections to your vnc server via tcp.
    #
    # use "-localhost" to prevent remote vnc clients connecting except when
    # doing so through a secure tunnel.  see the "-via" option in the
    # `man vncviewer' manual page.
    [unit]
    description=remote desktop service (vnc)
    after=syslog.target network.target
    [service]
    type=forking
    # clean any existing files in /tmp/.x11-unix environment
    execstartpre=/bin/sh -c '/usr/bin/vncserver -kill %i > /dev/null 2>&1 || :'
    execstart=/usr/sbin/runuser -l  -c "/usr/bin/vncserver %i"
    pidfile=/home//.vnc/%h%i.pid
    execstop=/bin/sh -c '/usr/bin/vncserver -kill %i > /dev/null 2>&1 || :'
    [install]
    wantedby=multi-user.target


    更新systemctl以使其生效

    [root@ecs-f61c-0001 sysconfig]# systemctl daemon-reload

    设置vncserver的密码

    [root@ecs-f61c-0001 sysconfig]# vncpasswd root
    password:
    verify:
    would you like to enter a view-only password (y/n)? y
    password:
    verify:

    按提示输入密码以及确认密码


    启动指定的桌面服务

    [root@ecs-f61c-0001 sysconfig]# systemctl start vncserver@:1.service
    或者
    [root@ecs-f61c-0001 sysconfig]# vncserver :1

    其他桌面类似

    关闭指定的桌面服务

    [root@ecs-f61c-0001 sysconfig]# systemctl stop vncserver@:1.service
    或者
    [root@ecs-f61c-0001 sysconfig]# vncserver -kill :1

    其他桌面类似

    设置为开机自动启动

    [root@ecs-f61c-0001 sysconfig]# systemctl enable vncserver@:1.service
    [root@ecs-f61c-0001 sysconfig]# systemctl enable vncserver@:2.service

    测试vnc连接

    安装vnc客户端

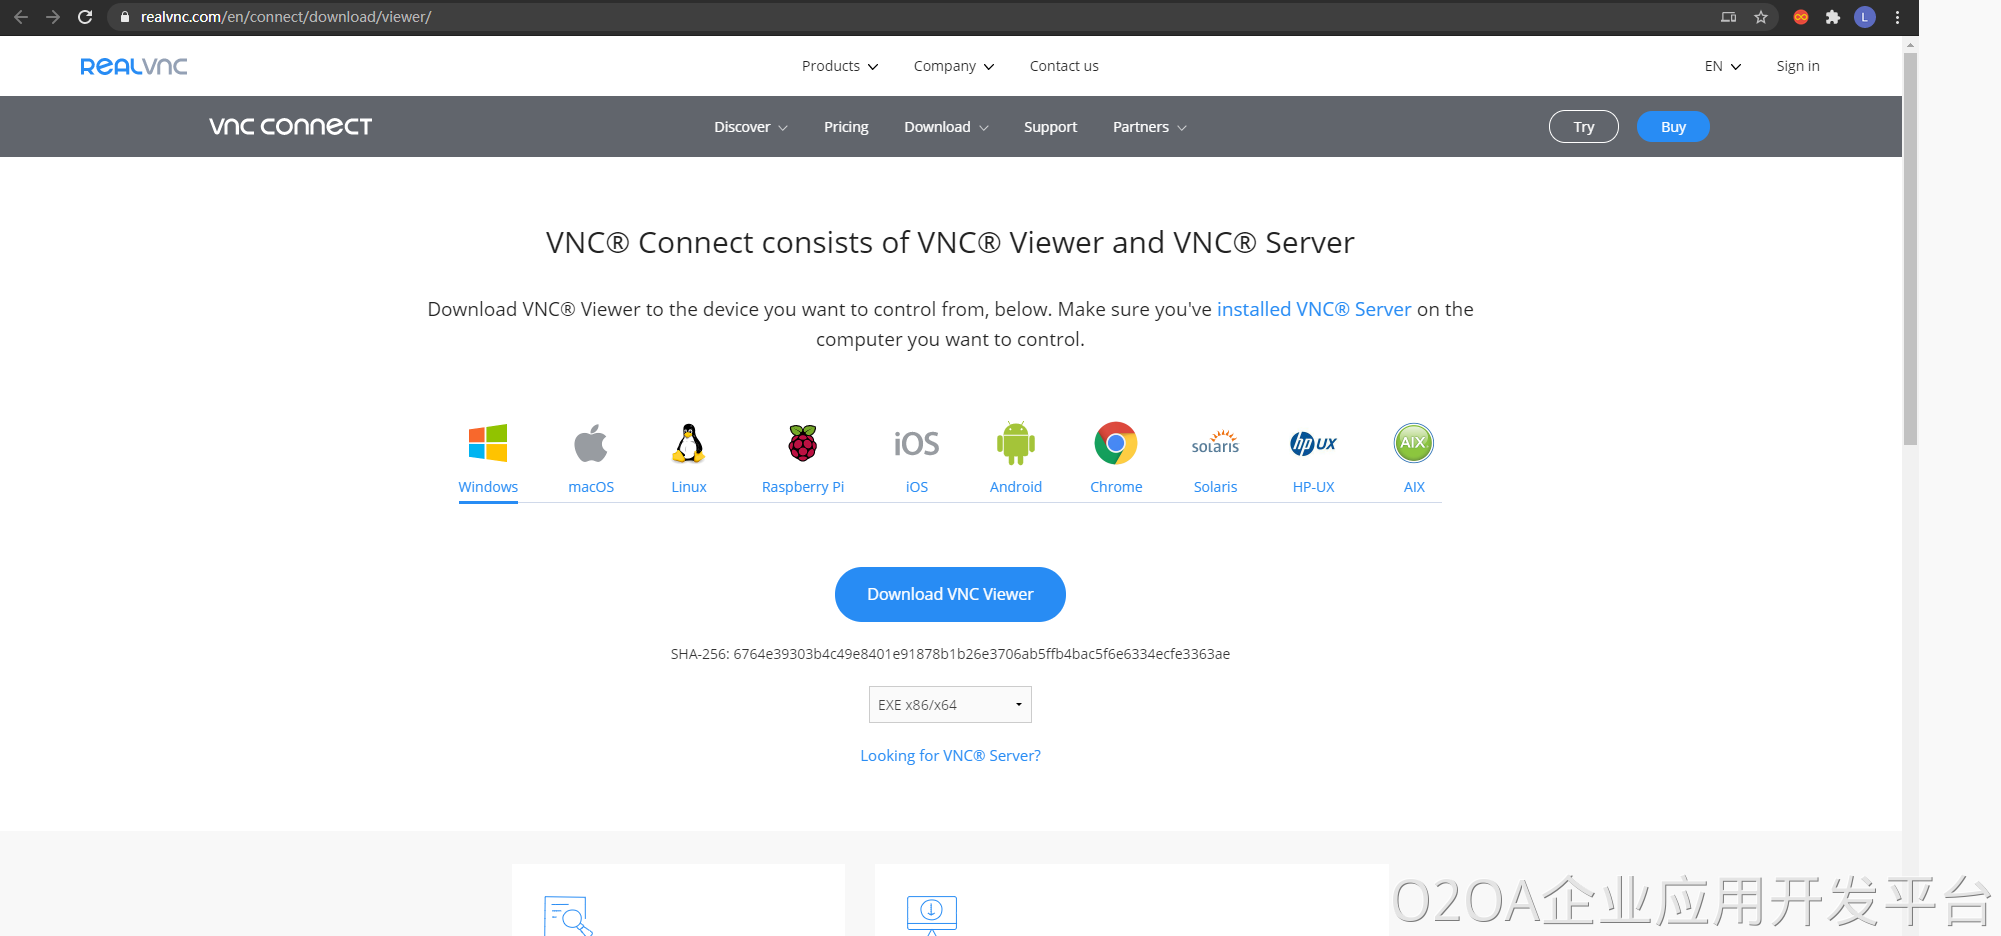
    realvncag8九游会j9登录入口官网:

    下载地址:

    1594174665227-1161ae83-e726-4040-bc81-6095b7ae2f82.png


    安装客户端(略)

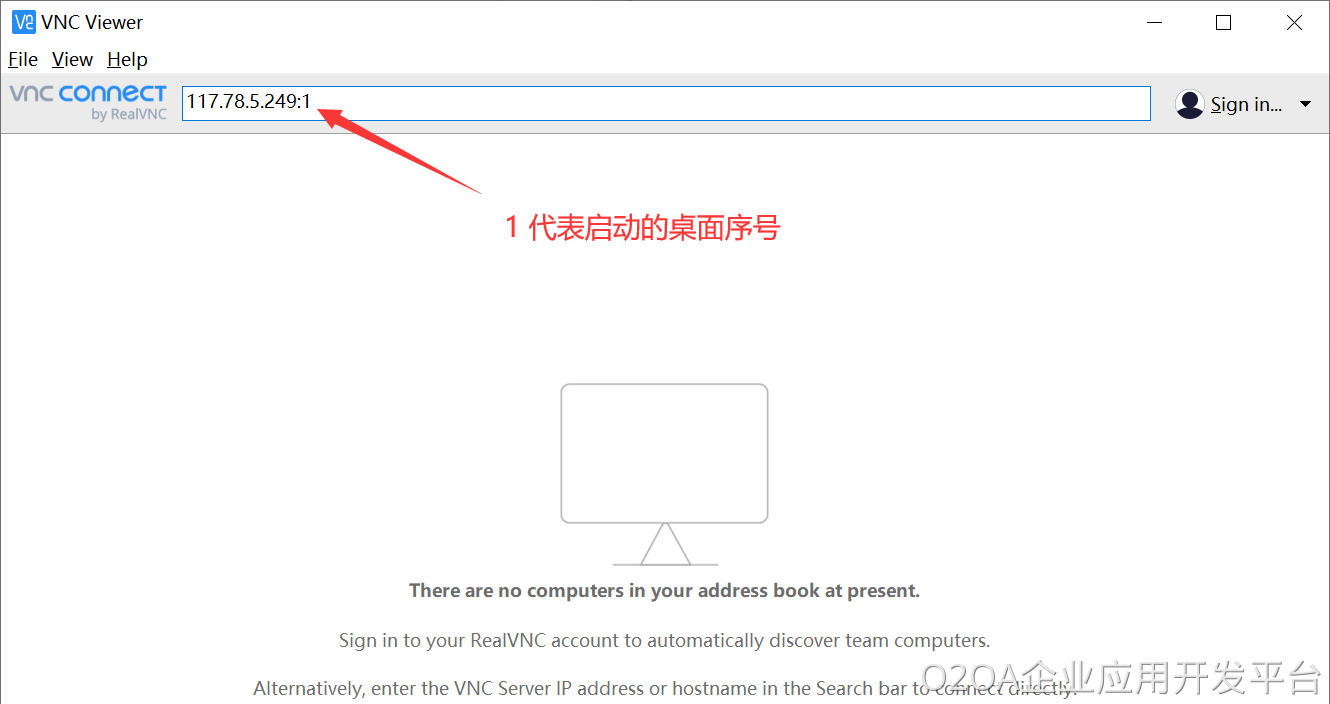
    启动客户端:

    1594174739905-4153eeee-fbd5-4157-b455-33b3ae071091.png


    连接服务器桌面:

    1594174773953-b72df229-971b-44b1-ac4e-684741e4cd62.png


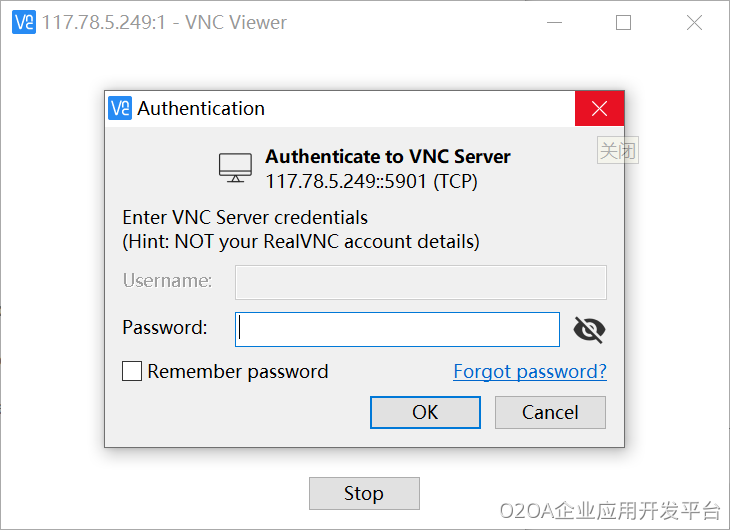
    输入密码连接成功:


    1594174808345-4448c6e0-2fd2-4816-aa65-d2bb328a33ef (1).png


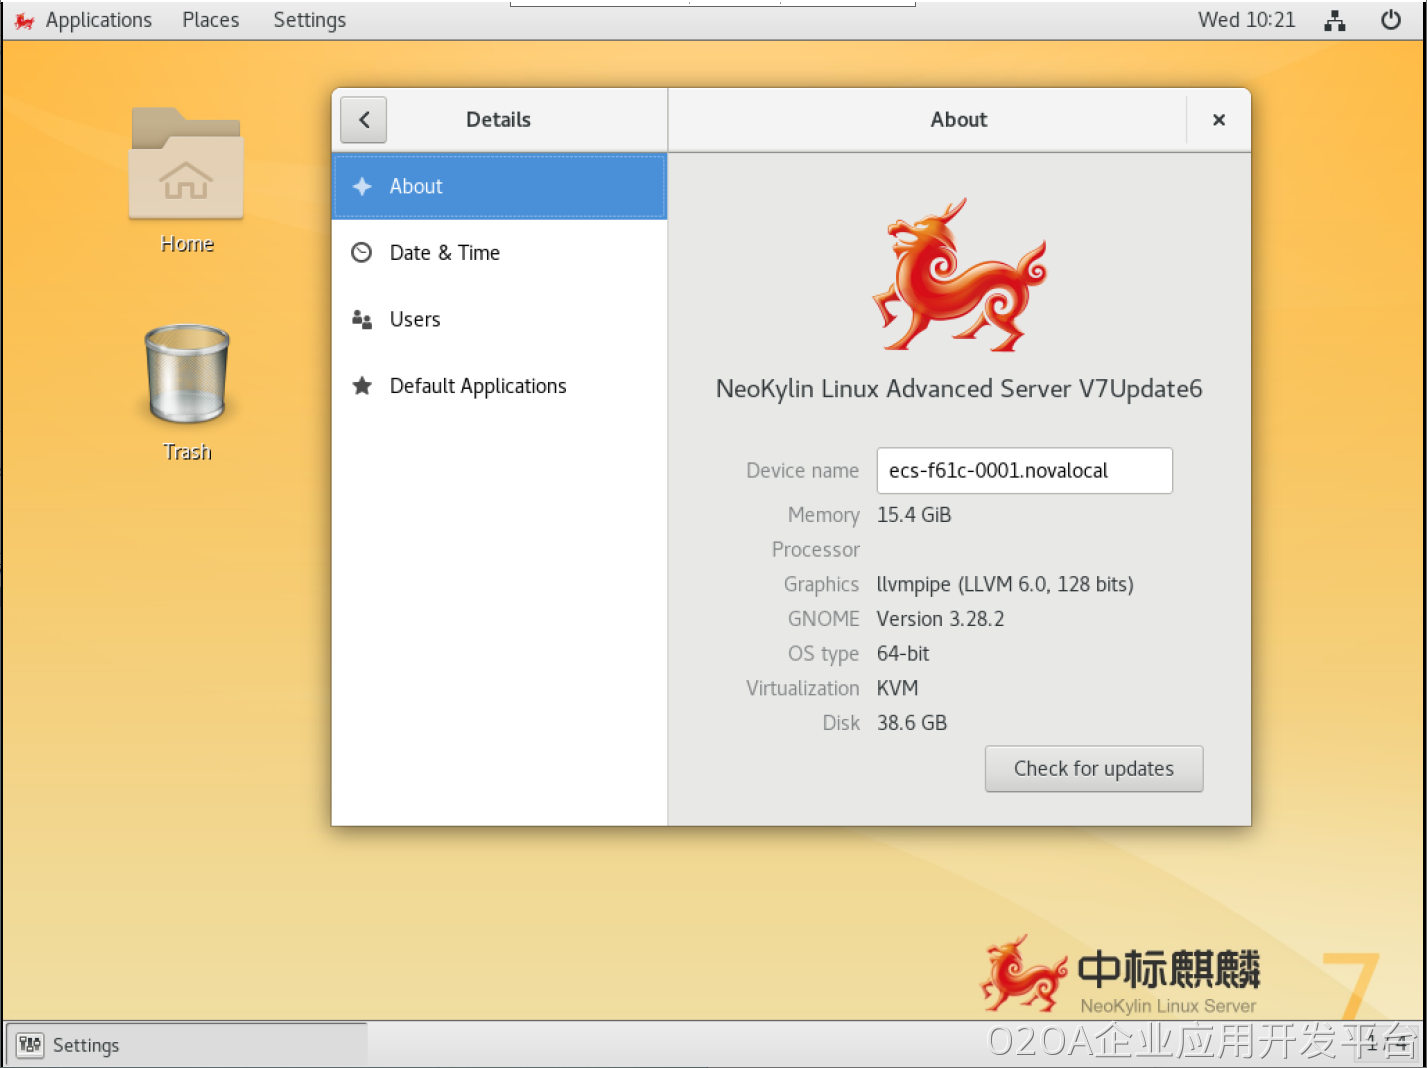
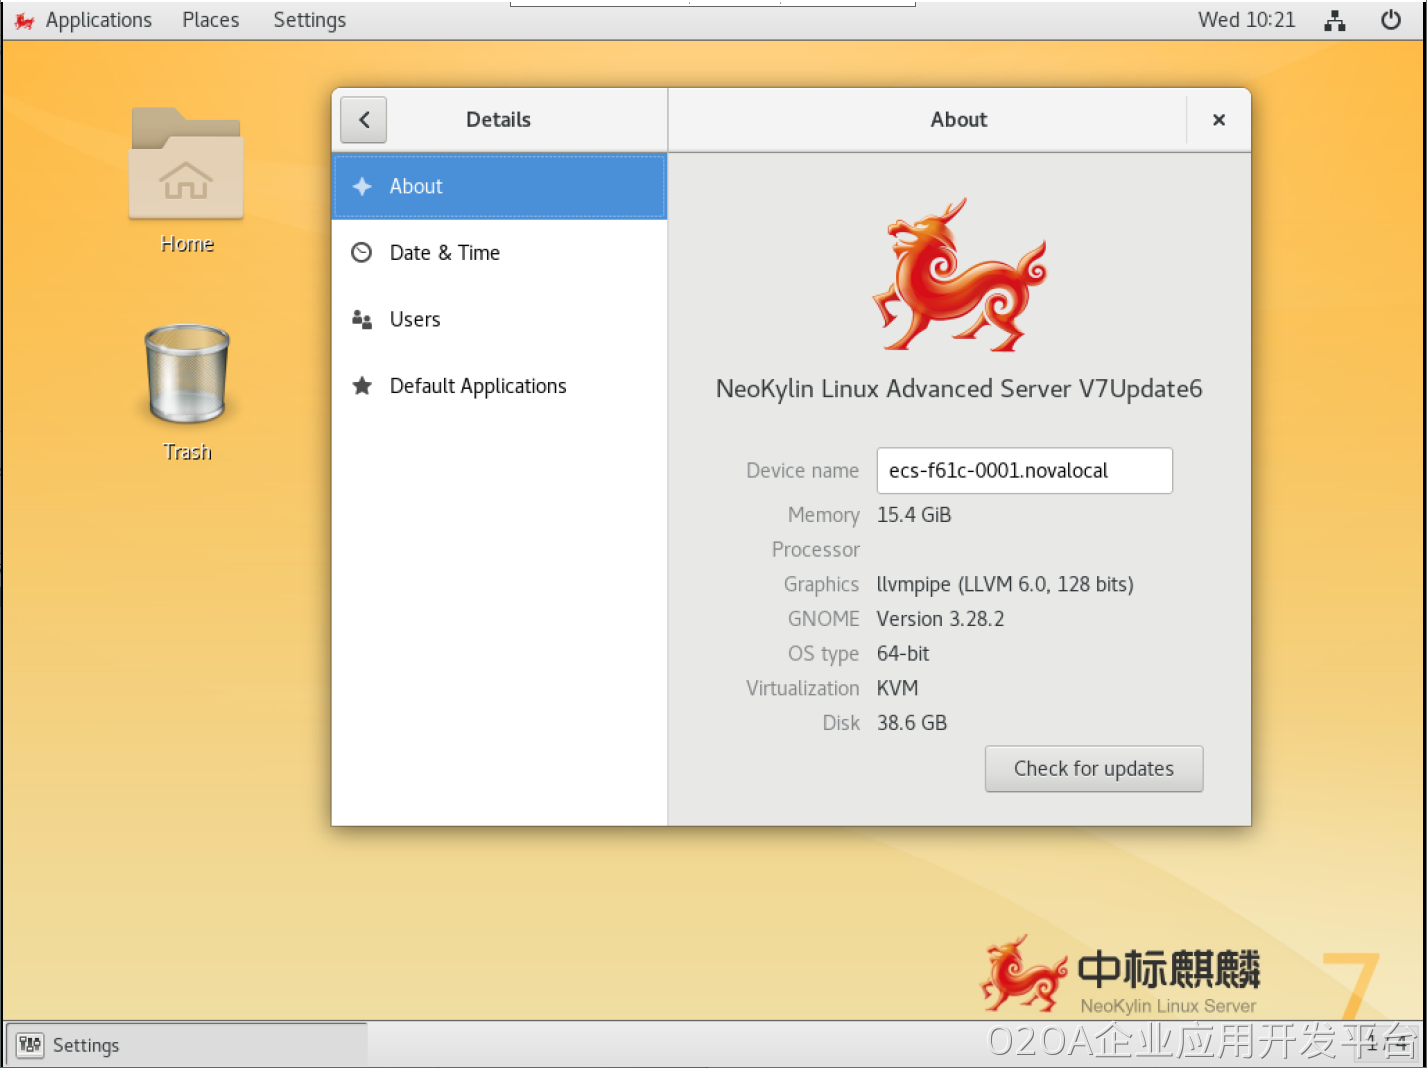
    正常登录服务器并且进行操作:

    1594174885377-7fb314f2-7484-4a31-8328-fe8f6d6f098b (1).png


    可能遇到的问题(centos环境下)

    1.设置为非root用户报错:

    [root@ecs-f61c-0001 sysconfig]# systemctl status -l vncserver@:2.service
    vncserver@:2.service - remote desktop service (vnc)
    loaded: loaded (/etc/systemd/system/vncserver@:2.service; enabled; vendor preset:
    disabled)
    active: failed (result: exit-code) since 一 2016-04-25 19:07:23 cst; 7s ago
    process: 10305 execstart=/usr/sbin/runuser -l fang -c /usr/bin/vncserver %i (code=exited,
    status=1/failure)
    process: 10291 execstartpre=/bin/sh -c /usr/bin/vncserver -kill %i > /dev/null 2>&1 || :
    (code=exited, status=0/success)
    
4月 25 19:07:23 localhost.localdomain systemd[1]: starting remote desktop service (vnc)...
    4月 25 19:07:23 localhost.localdomain systemd[1]: vncserver@:2.service: control process
    exited, code=exited status=1
    4月 25 19:07:23 localhost.localdomain systemd[1]: failed to start remote desktop service
    (vnc).
    4月 25 19:07:23 localhost.localdomain systemd[1]: unit vncserver@:2.service entered failed
    state.
    4月 25 19:07:23 localhost.localdomain systemd[1]: vncserver@:2.service failed.

    2.type=forking报错,改为type=simple

    [root@ecs-f61c-0001 sysconfig]#  systemctl start vncserver@:2.service
    job for vncserver@:2.service failed because the control process exited with error code. see
    "systemctl status vncserver@:2.service" and "journalctl -xe" for details.
    [root@ecs-f61c-0001 sysconfig]#  systemctl status -l vncserver@:2.service
    ● vncserver@:2.service - remote desktop service (vnc)
    loaded: loaded (/etc/systemd/system/vncserver@:2.service; enabled; vendor preset:
    disabled)
    active: failed (result: exit-code) since 一 2016-04-25 19:09:41 cst; 6s ago
    process: 12367 execstart=/usr/sbin/runuser -l root -c /usr/bin/vncserver %i (code=exited,
    status=98)
    process: 12354 execstartpre=/bin/sh -c /usr/bin/vncserver -kill %i > /dev/null 2>&1 || :
    (code=exited, status=0/success)
    
4月 25 19:09:41 localhost.localdomain systemd[1]: starting remote desktop service (vnc)...
    4月 25 19:09:41 localhost.localdomain systemd[1]: vncserver@:2.service: control process
    exited, code=exited status=98
    4月 25 19:09:41 localhost.localdomain systemd[1]: failed to start remote desktop service
    (vnc).
    4月 25 19:09:41 localhost.localdomain systemd[1]: unit vncserver@:2.service entered failed
    state.
    4月 25 19:09:41 localhost.localdomain systemd[1]: vncserver@:2.service failed.

    3.vnc viewer客户端连接黑屏,改变xstartup的权限

    这个问题是很多人容易忽视的问题,也是造成连接成功后黑屏的原因之一。

    在centos中,xstartup的文件路径为:/root/.vnc/ (可以通过locate xstartup来查看xstartup的文件路径)

    所以需要执行:

    [root@ecs-f61c-0001 sysconfig]# chmod 777 /root/.vnc/xstartup

    关闭防火墙


    [root@ecs-f61c-0001 sysconfig]# systemctl stop firewalld.service #停止
    [root@ecs-f61c-0001 sysconfig]# systemctl disable firewalld.service #禁用


    网站地图